Navigating the App
The Visivi application screen is divided into a number of components. The general layout is as follows, but may change slightly depending on what type of data is being displayed.
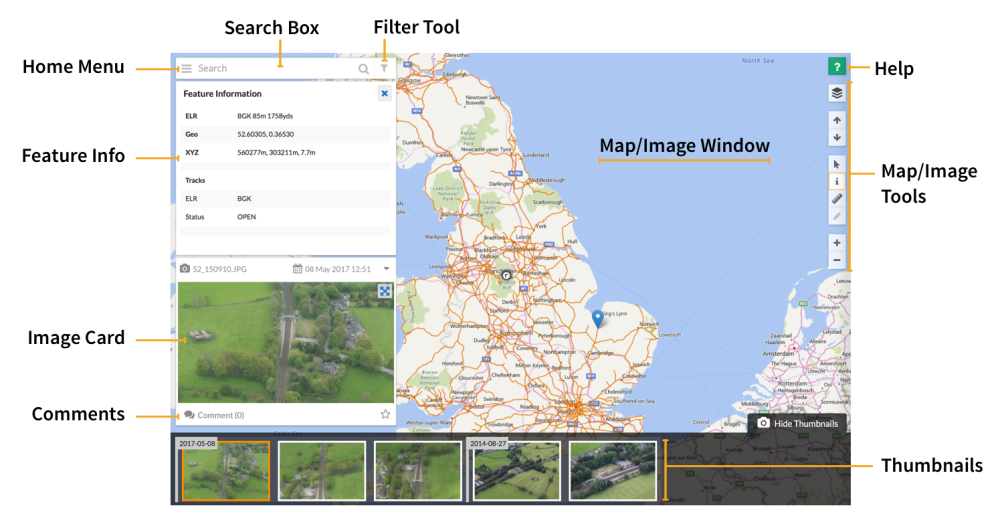
Starting on the left hand side of the screen, you will see:
The Home Menu
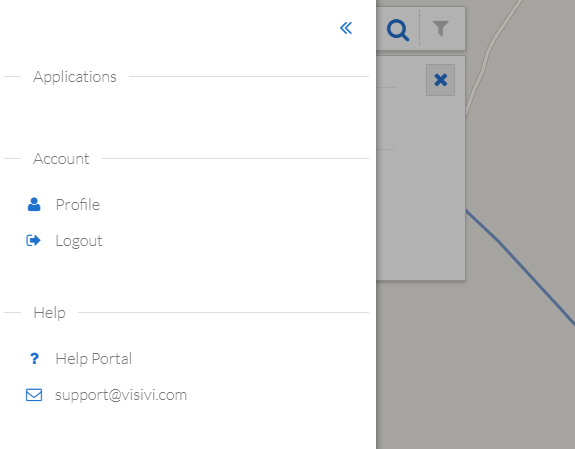
A drop down menu button, which gives you access to your:
User profile
Links to the help menu and details of Visivi support
Version Information
The ability to upload images (which is for admin users only)
Project specific applications
Feature Info
When using the Info tool and clicking on a map feature, it’s attributes will be displayed here. If an attribute contains a link, clicking on the link will open it in a new browser Tab.
Image Card
Displays a small version on the selected image together with its meta-data such as File Name and Date Taken. Clicking the Expand icon or double clicking the image will open it into the main Map/Image Window.
Comments
You can add comments to images which can be used in searches or to categorise images and pick out image features.
Thumbnails
A list of thumbnails of all images close to the selected image. This is sorted in reverse date order so you can scroll back through time and see how your asset may have changed.
Map/Image Tools
A number of tools which operate on the current Map or Image.
The Map Layers button gives you the option to change the backdrop map type between Map or Satellite. Note that the default setting within Visivi is Satellite view.There are also a number of map overlay icons which allow you to add or remove relevant overlay information. These overlays are industry or project specific.
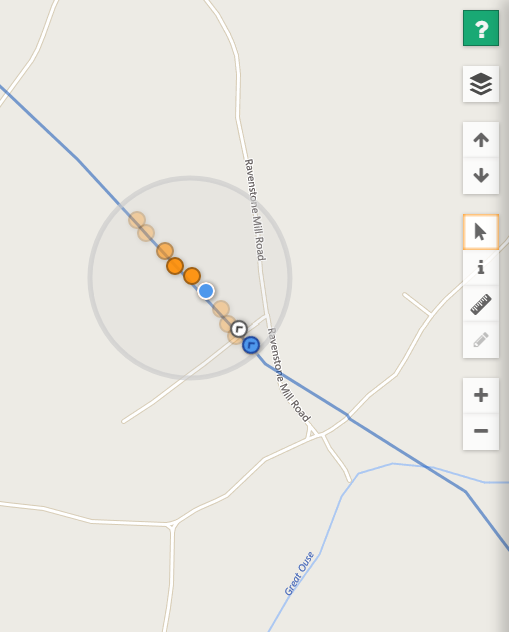
Other buttons on this side of the screen include:
The image navigation button, which allows you to move up and down through the images. Note that by holding the button down, this allows for image play through
The pointer tool, the default setting which takes you to a specific location on the map
The info tool, which will give you Feature Information such as location co-ordinates or Asset ID.
The measure tool which allows you to measure a distance or area of a set location both in map view or on a geo-referenced oblique image.
The mark-up comment tool allows you to click on a spot and add a comment directly to the image, useful if there is something visibly wrong on the line that needs to be identified.
And finally, the zoom tool. This can also be done using your mouse wheel or the track-pad on your laptop.
Help
Takes you to the main Documentation for the application. Yo may have clicked it to find this page!
Filter Tool
This opens the heat-map of all the images and allows you to filter the images to view them within a range of dates. The heat-map is also a useful tool for showing the overall photographic coverage of the route. More details
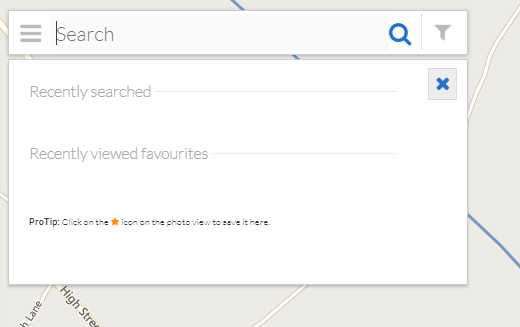
Search Box
You can search by place-name, postcode, image reference or by any image comments. As there are potentially thousands of images within Visivi, the search tool is vital to find the images you are looking for.